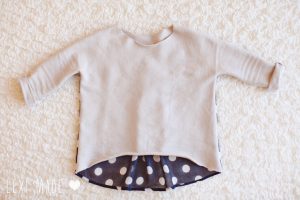
Today I am bringing home a tutorial I contributed to the blog Me Sew Crazy as part of the Sewing Rabbit team. It is a super simple but super cute chiffon back top I made for my daughter. It’s the perfect mix of casual and trendy. If you haven’t sewn with chiffon before, this is the perfect beginner project to give it a try. I actually have plans to make a few more this week!


Materials:
- Well fitting t-shirt for a template
- chiffon fabric
- french terry fabric (or any knit fabric)
- rolled hem foot (optional)
- serger (optional)
Instructions:
- Before we get started here are a couple of posts that share some awesome tips for working with chiffon. See this post by See Kate Sew and this post on Craftsy.
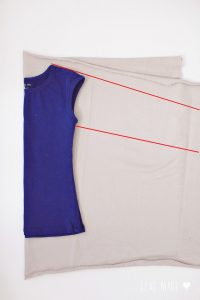
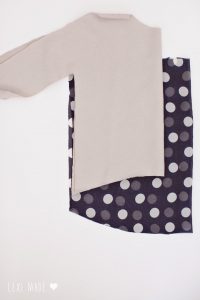
- Take your shirt you are using as a template and lay it on your fabric like pictured above. Cut around the shirt remembering to include your seam allowance. I wanted my shirt to have long sleeves so I drew lines extending from the neck and armpit to show how I cut my shirt. I also wanted my shirt to have a slight high-low so I curved my hemline as well. See photo below.
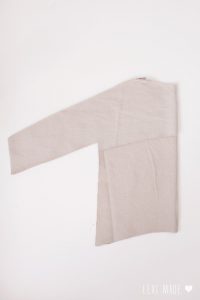
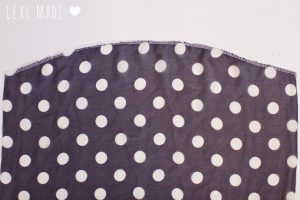
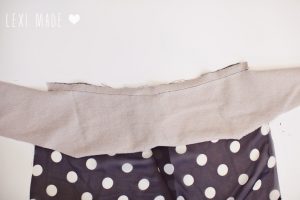
- Use the shirt front you just cut out as a template to make a back for your shirt. Cut the back so that it curves upwards towards the neck and starts and ends right under the armpit as shown above.
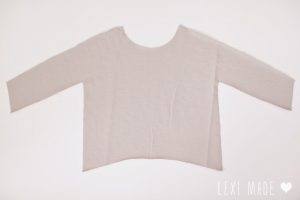
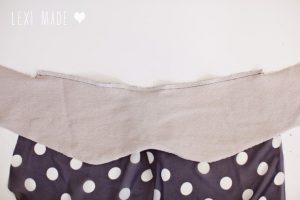
- You should now have a front and back that look like the photos above. Make sure your neck opening will be big enough to fit over your child’s head.
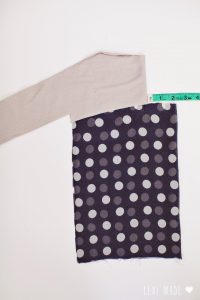
- Now you will want to cut the chiffon fabric for the back of the shirt. Use the front and back pieces you just cut out of your knit fabric as a guide for how you will cut your chiffon. You will want to cut the top of the chiffon piece at a curve to match the curve of the top of the back so that it will curve slightly upwards towards the neckline. You will want to cut the bottom of the chiffon to be a little longer than the front of the shirt on the sides to allow for hemming. You also want to cut the back at a curve so the hemline will complete the high-low look we are going for. And finally, you want to cut the overall width to be about 2 inches wider than the front of the shirt to allow for small gathers in the next step.

- Now we want to hem the chiffon. You can use a rolled hem foot for this step or use a serger like how I did.
- If you are using a serger simply serge the bottom hem of the chiffon. Make sure you turn your cutting blades off. Then fold the chiffon up once and then again and pin and then sew. I like this way best because it helps me get an even hem all the way across especially when the hem is curved.
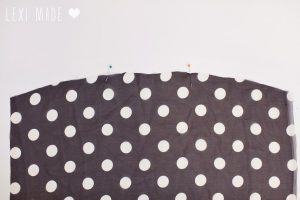
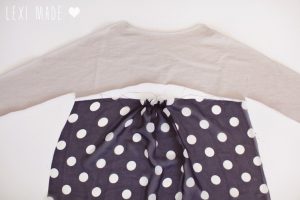
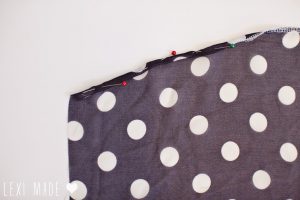
- Now you will want to find the middle of the top part of the chiffon and pin it so that there are about 6 inches in the middle for gathering. To gather just set your machine to the longest length stitch and bast stitch along the top. Do not back stitch at the ends. Then pull the threads on either end to make your gathers. You will want to make your gathers so that it lines up perfectly with the width of the knit part of the back of your shirt like pictured above.
- Now you want to pin your both pieces with right sides together and sew all the way across. Finish your seams as desired.
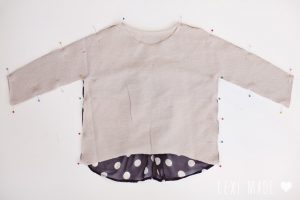
- Now take your front and back pieces and pin all the way around the shirt. You will want to sew all the way around using a stretch stitch or “lightning bolt” stitch like on my machine. Finish your seams as desired.

- Turn your shirt right side out and enjoy!! I chose not to hem my french terry knit because I like the look of the raw rolled edges and because it is knit it won’t fray. If you don’t like that look you can always hem it.
I absolutely love this shirt and ended up making one for myself! Sorry for the cell phone selfie! I never took proper photos of this top.

Chiffon fabrics come in so many cool prints so it’s a shirt you can have a lot of fun mixing and matching prints with. Here are a few pictures of my daughter wearing her new shirt!