Today I thought I would post a tutorial I made for Me Sew Crazy as part of the Sewing Rabbit Team. This was meant to be a spring top but I think it is perfect for summer as well. It’s a lace overlay top with an exposed zipper. Hope you love it!

This top is super simple and all you need is the following:
- lace
- lining
- well fitting shirt
- zipper
Okay! Let’s get started!

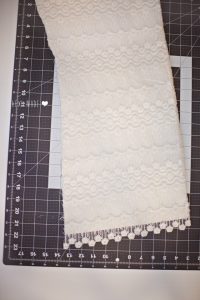
- Depending on the lace overlay you decide to use you may have to cut the bottom edge of your fabric so that the edges are super clean and nice looking. The lace I chose to use had a mesh type border all the way around so I just clipped it off making sure not to cut into the actual threads of the lace detail. If you are able to find lace that has a clean edge already then that is perfect!

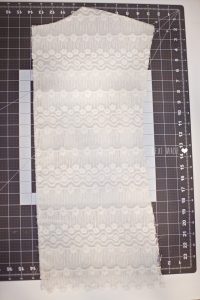
- Now you will want to place your shirt you are using as a template on top of your lace so you can cut the front and back of the shirt out. For the front of the shirt, you will want to cut on the fold. For the back of the shirt, you DO NOT want to cut on the fold and should leave 1/2” seam allowance along the back center seam. Be sure to remember to include seam allowance for the entire shirt as well when you are cutting. Repeat these steps with your lining material as well.
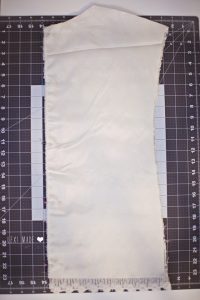
- You will want to hem your lining material so that it hits just slighting above the edge of the lace. I think this makes the lace overlay stand out a bit more.
- Now at this point, you can bast stitch the lace overlay and the lining together so you basically turn it into one piece of fabric. I didn’t do this for mine but if you are worried about not being able to keep the two pieces together straight and them wiggling around then I would baste together.
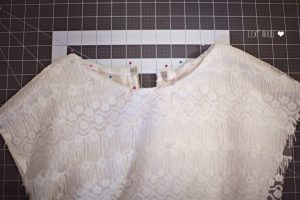
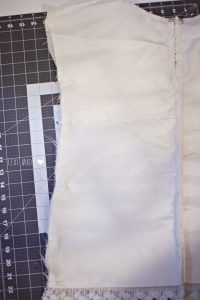
- Now you will want to put your two back pieces together right sides together and baste stitch at the top of the neck until where the end of the zipper will be. Backstitch a few stitches and then finish stitching until you reach the end of your shirt using a regular straight stitch length.

- Now you will want to open up your shirt and lay the seams flat open. Place your zipper on top of the right side of your shirt and pin in place. Make sure you get the zipper teeth lined up straight with your center seam. Also be sure to leave enough of an opening up top where the top of your zipper is to be able to fold the neckline over once you are done with the zipper. Now you will want to simply stitch the zipper in place along the edge of the zipper. You don’t even need a zipper foot for this. Once you have sewn your zipper in place grab your seam ripper and rip the basting stitches until you reach right before the end of the zipper where you backstitched so that you can open and close the zipper.
- Now you will want to fold over the edge of your neckline and stitch in place. I just serged my edges and then folded over once and sewed in place but you can fold over once and then fold again if you want.
- Now you will want to pin the sides of your shirt and sew. To hem the sleeves simply repeat the steps you just completed for the neckline.
And now you are finished!! Such a quick and easy top to make! Pair it with some colored skinny jeans to add a pop of color if you like. Perfect for this cheerful springtime weather.


I hope you enjoyed this tutorial and are inspired to add a lace top to your spring wardrobe Until next time, happy sewing!